The things I have learned this year:
- When I tell myself 5 minute limit on the computer it ends up being 15. Maybe I should start aiming for 1 minute...
- Laundry doesn't do itself.
- Listen.
- Good enough is an excuse for a crappy job.
- There is never a "right time" to quit.
- Being the dumbest in the room is a good thing. It means you are the smartest in the room to surround yourself with those who would lift you up.
- Telling myself to "just do it" gets more done than "I need another cup of coffee for that."
- Baby gates only work for babies, not toddlers.
- I would rather buy a toy for my son that buy myself anything.
- Every second counts. Ever minute is precious. Every day is a gift. Every year is a giant opportunity to succeed.
- Eat well to live well.
- The sooner I get dressed the more I will accomplish.
- No matter how high up you hide the sharpies the child will find them.
- Fashionably Late is a lame excuse for "I didn't care enough to be on time."
- I have control issues.
- There is always room for improvement.
- If you are not moving forward you are moving backward or stagnating - either way is not good.
- The ability to accept help does not show weakness. The ability and willingness to return the help is where you show strength.
- Be Organized.
- Show others you appreciate them every day.
Not bad for a year... I'm only that much more determined to make next year even better now.
Showing posts with label stuff. Show all posts
Showing posts with label stuff. Show all posts
Thursday, December 27, 2012
Wednesday, December 19, 2012
DIY Lace Patch for Clothes and Jeans

5 Simple Steps to Patch old Jeans with Lace
Recently one of my favorite pairs of pants started ripping at the back. For a while I sucked it up and wore them with shorts underneath but the hole just kept getting worse every time I wore them so I decided to do something about it. In my massive piles of sewing odds and ends I happened to have lace... lots of lace (Thanks Grandma.) Follow along to see how I fixed my favorite pants to make them even better!

1) Lay clean pants on a flat surface with lace on top of the hole. My hole was big enough I needed two rows of lace to cover it. Cut the lace about an inch too long (1/2" extra for each side of the rip). If you don't cut the lace long enough your patch won't cover the entire hole and it will continue to rip further.

2) Since my lace needed to be wider to cover the hole I just cut two pieces the same length and cut a piece of hemp cord (about 2" longer than lace segments) to use as a stabilizer for joining the lace. I then placed both lace segments back to back with the hemp in the middle. To join them I used the widest zig-zag stitch on my machine with a short stitch length for the maximum amount of strength in the seam. I stitched down the middle ensuring the hemp cord was captured inside the zig-zag and both pieces of lace were secured together. I decided to use hemp because I have it on hand, it is cheap, and I like the natural look of it with the lace. You could use any type of strong cord pretty much.

3) After joining my two lace segments I cut the hemp cord to be 1/4" longer than the lace on each side. I left the hemp longer so I would be able to turn it under and prevent unraveling.

Broken needles happen... just make sure you pull out all the little metal pieces or it can really damage your machine. My needle broke while I was sewing around the extra thick seams in the crotch. If you advance the needle by hand in the thickest parts it's less likely to break.

4) (Showing stitches inside jeans) I first zig-zag stitched a big rectangle to secure the lace to the jeans. Make sure to turn your cording under and zig-zag over it extra well if you had to use it to stabilizer. If you don't the stabilizer cord will pull out and your patch will fail. I tried to only zig-zag on the busy parts of the lace to hide as much of my thread as possible on the visible side. The rectangle will keep the lace in place but you still need to sew down any ends that are loose so they don't stick out when you wear your pants. I did this by using a straight stitch to sew around the outer edges of the lace patch. You can see this in the photo above where the straight stitch makes little triangles outside of the zig-zagged rectangle. This way I don't have any loose lace bits flapping around on my butt.

5) Last Step! Cut any loose thread ends and try pants on. Now brag because your favorite pants just got even better!
This took me about 30 minutes to do (even with taking photos) and maybe half a brain cell. When I wash these pants I try to turn them inside out to protect the lace from snagging on other clothes. So far the patch has held excellent with no damage. Let me know how your lace patches turn out!
Tiny
Tipis is a small handmade company providing environmentally
friendly products to help customers reduce their carbon footprint.
We focus on using high quality materials with attention to detail and
running our company as close to zero waste as we possibly can. All
shipping materials are recyclable, compostable, and/or biodegradable.
See more
of what Tiny Tipis does for our planet at any of the links below:
Thank you for being environmentally responsible!!!
Wednesday, December 12, 2012
The Greatest Gift of All
Yep, you guessed it. It's that time of year again when the reindeer are out and Santa is about. People scurry to and fro to get the latest gadget to give them more mojo... and bloggers become poets who don't even know it. Oh my!
I'll keep this short, sweet, and to the point: COUPON CODES!!!
For 10% off your entire order from www.TinyTipis.etsy.com use HOLIDAY2012
If you prefer FREE SHIPPING check out the new Tiny Tipis Website! We just added the option to purchase directly from us and are offering free shipping through December 2012 on all orders.
BONUS!!! All orders shipped in December will be gift wrapped so you don't have to worry about it! Nothing says Christmas like a pretty present under a tree.
If there was ever a time to buy it is now! Shop happy, stay warm, and keep safe through this holiday season. :)
To keep up on all the future sales follow Tiny Tipis on Facebook: www.facebook.com/TinyTipis
Find our inspiration on Pinterest: www.pinterest.com/TinyTipis
And as always, Shop Tiny Tipis online in any of the following places:
Monday, July 2, 2012
Where Do You Sleep

It's hard to explain being poor to someone who has never wanted for anything. I wouldn't even know where to begin. Priorities change as one gains wealth. Children suffer from poverty silently. They lack the ability to change many things about their life and depend on others for nearly everything. They tend to make the best of every situation because they don't have the life experience to know that there is something better out there. I've slowly been evolving as a person as I see poverty and grief all around, not just in America but everywhere. Today, I share this photo series by James Mollison called Where Children Sleep. Open your eyes for a moment.


Kaya, 4, Tokyo Japan


Indira, 7, Kathmandu, Nepal


Alex, 9, Rio de Janeiro, Brazil


Alyssa, 8, Harlan County, USA


Ahkohxet, 8, Amazonia, Brazil


Lewis, 10, Barnsley, England


Lamine, 12, Bounkiling Village, Senegal


Prena, 14, Kathmandu, Nepal


Nantio, 15, Lisamis, Northern Kenya


Risa, 15, Kyoto, Japan


Kana,16, Tokyo, Japan


Bilal, 6, Wadi Abu Hindi, The West Bank


Joey, 11, Kentucky, USA


Dong, 9, Yunnan, China
All Photos in this post are from here.
Thursday, June 21, 2012
Fabric Bowl Project Obsession
 |
| http://whipup.net/2008/09/20/how-to-fabric-bowl/ |
I've been a bit obsessed with fabric bowls this week. What a useful concept! They are washable, portable, and nearly unbreakable (perhaps the most useful feature for a stay at home mom.) I saw a picture on pinterest of a tutorial on how to crochet a sturdy bowl using multiple threads. When I clicked the link of course they wanted $4.99 for the "pattern" so as a seamstress/artist/creative type I stared at the picture for a moment and then set about making myself a bowl. I've since moved on to making nesting bowls for my husband and I's fifth wheel as these proved so nice.
First I would like to cover the various types of Cloth Bowls I saw. There are wrapped and sewn bowls, pattern sewn bowls (I call them petal bowls because of how the pattern looks before sewn), woven bowls, glue hardened bowls, and crocheted bowls. Of these types of handmade bowls the ones hardened with glue or fabric stiffener are the least portable. A soft bowl can be folded so that it fits in a small flat area and takes up less space - something I appreciate very much for storage space in the camper.
 I decided to try the crocheted bowl since I had the materials readily available. Since there are two threads involved it makes the bowls a little stronger and more able to retain shape. The outer thread that is seen is plain yarn while the inner thread is an old t-shirt I cut into strips. The t-shirt yarn is thicker than the regular yarn so it gives the bowls the stability the standard yarn lacks. As you can see in the photo I used a single crochet and simply worked my stitch around the t-shirt yarn. When I've completed 10-15 stitches I gently tug the t-shirt yarn and it tightens everything. I repeat this the whole way through giving the bowl a more finished look. Don't tug too hard on the t-shirt yarn though or it will cause the prior stitches to buckle.
I don't really have a formula or pattern I follow. I increase stitches and do my best to keep the first few rows flat and even because these become the base of the bowl. When I have the base 10% larger than looks needed I stop increasing so the sides will start to come in. I like to pull the sides of the bowl in at the top as an extra stability feature. I do this by decreasing stitches on the top 2 rows only. I do the top 2 rows with a contrasting standard yarn and no t-shirt yarn filler.
You can cut the t-shirt yarn and simply leave it loose in the stitches over it or you can pull it out and use it as a decorative stabilizer. I pulled my white t-shirt yarn out when the main bowl color ended and stitched it in swirls around the exterior of the bowl. This seemed to pull the various rows together even more and added a look I liked.
 |
| The first bowl I made. It contains my husbands lighters on the counter. |
There are no limits to these bowls except your ability and creativity. Crochet stitches come out so try something new. If you don't like it just pull it out!
To see other things I've made that are for sale or to request custom items and art visit my Etsy Page.
Tuesday, May 8, 2012
Personal Growth
 |
| Big Rig Jig by Mike Ross |
I grew up with a wasteful attitude. I didn't know it, I was American. I lived life big, always wanted the newest and best of everything. Shopping used and recycled meant poor to me. I can remember ducking my head whenever mom wanted to shop at Goodwill just in case someone from school would see me. The word handmade was usually followed by the word "crap" when I was younger as I saw homemade gifts as cheap knock-offs. I stupidly thought as a child that people only move up in this world. Once a solid middle-class girl, now I am a struggling lower-class artist.

With age comes appreciation though. I live in a tiny house with a walk in closet for a nursery and an oven that is older than sin to cook on. One of our built-ins used to be a window and it never got properly sealed so if I forget to spray it with bug repellent I sometimes have the pleasure of fending off a line of ants that comes in the cracks. Eventually I will caulk it myself but at the present time I don't have money in my budget for even that.
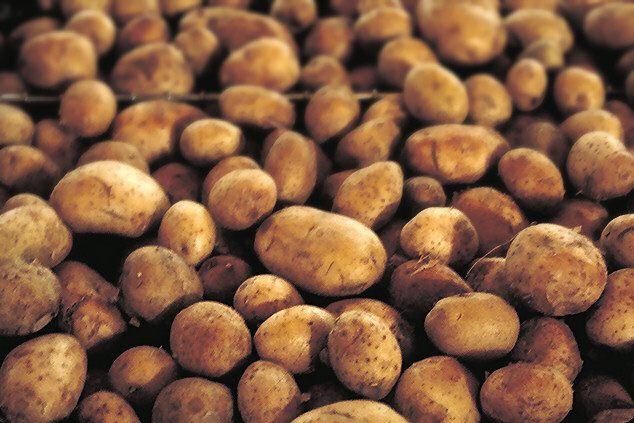 My mom still can't believe I manage to buy groceries for three, diapers, and formula on a $300 per month budget. Sometimes I don't think I believe it either. The key to that is actually making sure to buy only what you need and NEVER waste. Single serving casserole dishes are a huge help as well as having access to a large freezer. I almost never buy meat at full price and instead make sure I get to the store early enough to have first pick of the sale items and then I can put them in my sub-zero freezer when I get home. After graphing my monthly food expenses I found that between non-obsessive coupon clipping, shopping sales, saving scraps, and doing the eCoupons through Safeway's website I can save myself an average of 30% of my bill. Potatoes that sprout no longer look like trash can liners to me. Shredded, soaked, and frozen between wax paper will save that bag of spuds and give me a side dish for breakfasts.
Recycling is not some lofty concept for me anymore. I can't afford new canvases to paint on which means I definitely can't afford a new frame to put it in. Instead I frequent Goodwill, the Arc, and other thrift stores. It feels better to only spend $5 and walk out of a store with 2 canvases and frames that fit. Then I watch out for free sample quarts of paint in the papers so when I redo the frames it costs me nothing but time. I make it a goal to only fill a bag a week with trash so the landfills aren't as filled by me. I started using Chickory in my coffee too which saves me a few bucks a week. Heaven help the world if I don't get my coffee.
The other day a friend of mine called to say he was moving and to see if I wanted anything from his house that he wasn't going to take. The old me would have scoffed at the food that wasn't directly from the supermarket, anything I already had, or something that I might need to wipe the dust off. I would have taken the office chair I'm sitting in and that's about it. The current me however took everything and then blushed as I said thank you. It still feels weird sometimes to take "handouts" but I just remind myself that it's better that I use it then it get tossed out. "It's not greedy if you use it, it's thrifty" I keep telling myself.
Never again, I promise myself, will I walk by a penny on the ground and kick it further into the street. Never again will I use a freezer bag once and toss it out because it has condensation droplets inside. For the days ahead; I hope to be thrifty while leaving a smaller footprint on the planet. It's not just necessity anymore. I feel a passion for living small and being within my means. Life is more rewarding when my waste is less. :)

Subscribe to:
Posts (Atom)