Showing posts with label all natural. Show all posts

Thursday, July 18, 2013

Giveaway Time!!! Win a FREE Tote Bag!

Win a free Market Tote from Tiny Tipis! Easy entry for everyone! (Giveaway now CLOSED)


FREE shipping is included for all US fans.
Share with your friends for more chances to enter!
Come back every day for more chances to win!


Want more chances to win? Other Current Giveaways:
Bridal / Prom Handmade Headband


Wednesday, July 3, 2013

A Good Day for Roses

Roses and Canvas
I had a friend from High School drop by the other day. She noticed my roses in front were blooming and asked if she could have some. Of course I said yes.


Emily modeling a Tiny Tipis Canvas Bag
  Seeing as I didn't have a vase handy I decided to have her put her bouquet in one of my canvas bags. Hey, if it works for fresh produce why not fresh roses, right?


Fresh cut red rose being kept safe in a Tiny Tipis Market Bag
 She couldn't have picked a better day to come see me. All the rose bushes were in bloom and her yellow dress really complimented the colors.


The Tiny Tipis 10 ounce Canvas Grocery Bag even keeps flowers fresh until you get home!
Thorns aside, I think she really enjoyed getting to pick her own roses.


Emily smelling a fresh cut rose before she puts it in her new Handbag
 Even though the flowers were contained in the Canvas Tote the lovely smell was not. I wonder how long her new bag will smell like roses.


Roses just peeking out of the bag.
 Look at the smile on her face! I'm not sure what I like better, seeing someone put one of my bags to good use or enjoying my roses.


Home Grown Roses in a Tiny Tipis Canvas Bag
She grabbed a few more after I snapped this pic. I think if I let her know when the next bloom cycle comes along I'll be seeing her again.  :)


You can buy your own Tiny Tipis Canvas Bag and use it to store and carry just about anything. Sorry, roses not included.


Tuesday, June 11, 2013

To Dye For

Select your color here.


 NOW AVAILABLE FOR PURCHASE ON THE WEB!!!

Tiny Tipis has listed more colors of Vegetable and Produce Dyed Bags for your visual consumption. These all natural bags will last longer than store bought canvas bags and they boast a wide variety of colors that can only be found in nature. No two bags are alike making them a true natural tie-dye.


Read about Tiny Tipis first event here.


 Hand Painted Designs are available at your request. Custom orders welcome. Get noticed carrying a Tiny Tipis Dyed Bag!!!


Dyed with all natural Vegetable and Produce Based Dyes


Every Tiny Tipis Dyed Bag is unique.


Wednesday, May 15, 2013

Hiking Around Colorado

aspen tree budding
Aspen trees just starting to bud.

I played with a new camera while hiking around Colorado the other day. I must say I was pleased with the resulting shots. Canon Rebel T4i with a Telephoto lens. Hope you enjoy!


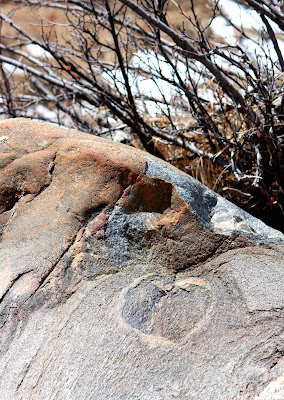
heart rock nature
Heart on a rock
nature stump rock formation  log water pond
dead tree photographypine tree nature photography

snow falling
Snow falling


Me


Friday, April 19, 2013

Giveaway Winner and Territory Days Debut

Tiny Tipis is going to Territory Days!


A big thank you to everyone who entered the giveaway and Hello to all my new readers! The giveaway brought in new fans from around the world and earned one lucky person a Tiny Tipis All Natural Hand Dyed Market Tote. If you missed this chance to win FREE Tiny Tipis products keep reading - there will be more opportunities in the future! Many Thanks to Created By Laurie for Hosting the Giveaway.  :)

Tiny Tipis is glad to announce our upcoming debut at Territory Days in Colorado Springs, Colorado. Territory Days is one of the largest festivals held every year in the Springs. We are excited to be attending our first event as a vendor and hope to see you there! Attendance is FREE with lots of things to do, shows to see, and shops to check out!


Read the Tiny Tipis Blog
Get Inspired by Tiny Tipis on Pinterest
See the Tiny Tipis Videos on YouTube


Thursday, March 7, 2013

To Dye For


 I love Natural Dyes. It's a recent thing. Maybe even a new obsession. The smell, the variety, the mystery of what will I get this time?... It makes my heart go pitter-patter.

Canvas Market Tote in Rose
When I was in 1st grade I sat next to a boy named Wesley. Other kids made fun of us. We didn't care. We used to sharpen our colored pencils together with a common interest in the resulting color of the shavings.  Somehow, for some strange reason, it made us happy. Wesley and I bonded over the simple pleasure. 


I haven't seen Wesley since 1st grade but I still think of him when I mix colors. The child-like eagerness to experiment comes back in the blink of an eye. I wash my soul in the colored water and it gives back to me the vibrant joy I seek.

Only Nature makes colors like this...

You can purchase a piece of my soul if you like. It comes in the form of a soft hand dyed market tote that will serve you well for a long time. I guarantee it is made with all the love and care one can put into it.


Monday, February 25, 2013

DIY Tie Dye with Red Wine

Easy Do It Yourself Dye

 I'm obsessed with Fabric, especially canvas. It's natural, it's strong, it has more uses than a swiss army knife... and it can be a challenge to Dye. There's nothing I love more than a challenge. 


I also love red wine. 


Here is how I use Red Wine to Dye Fabric, including so-called "non-dye-able" Canvas, and a shirt I never wore:


Supplies: 
White or light colored fabric (I used cotton)
2+ cups Red Wine
Rubber Bands or Hemp Twine
Oven
Clean Baking Pan
Jar or Bucket 
Iron
An Old Towel

Supplies laid out ready to start dying fabric


 Step 1: Tie up items to be dyed. If you bind it with more wrinkles you will end up with more light colored areas after you are done. The tighter you tie or band it up the more areas of light color will remain as well.

Cotton articles tied up and ready to be Dyed with Red Wine


  Step 2: Steep the items in the Red Wine for at least 2 hours. I let mine soak for 4 hours.

A white shirt after soaking in red wine for 4 hours


Step 3: Squeeze the wine out of the fabric. Leftover wine can be saved to re-use next time you want to dye but the color won't be quite as strong. For really dark dye wring until no liquid drips. For lighter dye wring as much out as possible.

Wine Dyed items being laid flat to dry in the oven


 Step 4: Lay items as flat as possible on your clean baking sheet. Try not to let them touch or overlap so the color doesn't bleed from one article to another. Your baking sheet must be clean or you risk discoloring your dyed items. I covered mine with foil just to be safe.

Wine Dyed clothing and fabric drying in an oven


 Step 5: Set oven at 170 to 180 Fahrenheit with damp dyed items inside. The combination of heat and drying with the wine pigment still on the fabric helps set the color. Make sure to set a timer so you don't start a fire. I checked on my items every 10 minutes. The small items took about 20 minutes to dry fully while the shirt took over an hour. I didn't want to put freshly dyed items in the dryer in case it might leave color behind which is why I chose to do it in the oven.

Check your items every 10 minutes: Safety First!


Step 6: (This step is optional. I did it to make sure the color was fully set.) Lay your old towel on an ironing board. Iron dyed items as you normally would. The heat will help set the color so it won't fade with washing. The towel prevents your ironing board cover from getting any color on it if your dyed articles aren't fully dry yet.

Small test items in a Red Wine Dye Project


Step 7: Hand wash dyed clothing and fabric in warm water to get rid of any pigment that didn't set. This way the color won't spread to items you don't intend to dye when you wash it after regular use. After dying an article you should avoid washing it in hot water to keep the colors bright.

Gorgeous color and pattern from Red Wine Tie Dye


 And the finished product... 
I like this shirt so much better with the natural earthy rouge dye than I did when it was plain white. I think I'll actually wear it now!


Thanks for reading!!!
Click here for more great DIY ideas or visit the other Tiny Tipis Blog to learn about recycled urban gardening.


 Tiny Tipis is a small handmade company providing environmentally friendly products to help customers reduce their carbon footprint. We focus on using high quality materials with attention to detail and running our company as close to zero waste as we possibly can. All shipping materials are recyclable, compostable, and/or biodegradable. See more of what Tiny Tipis does for our planet at any of the links below: 
 

 Thank you for being environmentally responsible!!!

Saturday, February 16, 2013

Home Brew Heaven - Part 1

The foam shows the beer is brewing.
As time passes I am learning to appreciate the smaller things in life. Things like good beer, quality wine, and pungent cheese... fresh veges from the garden and the earthy smell of a well maintained compost. Right along with learning to love these small things comes the desire to learn how they are created.

My husband and I have a friend who has some experience brewing beer at home, home brew if you will. Let's call him Spiky since that is what my son call him. Spiky showed up the other day with malt and hops and a bunch of other things and said, "Let's make beer!"

Spiky poured some goo, malt extract, into a large brew pot and we all waited impatiently for 50 minutes until we reached the final 10 minute stage where the hops are infused into the concoction. After the flavor of the hops had time to infuse our brown liquid we drained it into a large glass carboy and waited for the temperature to reach around 85 degrees Fahrenheit. At that point we added the yeast and sealed the carboy to keep germs out.

We sat the 5 gallon carboy in our den to ferment. Our den stays between 55 and 65 degrees since we keep it closed off to save money in the winter. I wrapped an old towel around the base to catch any splooge that came out of the bubble airlock. It seems so simple I don't know why I've never done this before!

Supposedly in 3-4 weeks we will have some Pale Ale Homebrew to bottle and keg. Spiky is fairly confident it will taste good since he has experience with this. I'm just excited to know how beer is made. I'll let you know how it turns out when I finally get to taste it.  ;)


Last night I had some lovely "me time" while the boys had a night out so I took the ultra rare opportunity to enjoy some wine, cheese, and blueberries. Cabot from Vermont makes an amazing white cheddar that pairs well with almost any red wine. Bicicleta by Cono Sur was a good wine for under $10 and fits well with my recent Chilean Wine kick. Mmmmmm... was a good night indeed!


For more Tiny Tipis updates Like us on Facebook or Follow us on Pinterest. Hop on over to the Etsy shop or Zibbet store to support Hand Made Goodness. Thanks for Reading!!!

Saturday, August 11, 2012

Secret Summer Recipe

There is a small thing I have been doing this month that not only helps keep my body healthy but reminds me to take little breaks. I have a secret recipe for a summer beverage that I think I may be willing to share finally and I promise you'll love it. I call it Health Tea. My hubby calls it "That Tasty Water Stuff." My son even drinks it and he can be kinda picky!

I make it in bulk and freeze portions not only to save money but to save me time. I will first cover how I make it in bulk and I will give the portions toward the end to make it in single batches in case you only want a little to try first. This beverage is beneficial for your body in how it helps you shed toxins, keeps you hydrated, gives you vitamins, and tastes amazing! Oh and did I mention it's cheaper than soda? Healthier too!  ;)


Items you will need:
2 Lemons
4 Limes
1 Large Cucumber
1 small chunk of Ginger Root
Apple Juice
A pitcher (1-2 liter)
7-8 Ziploc Freezer bags


Wash all ingredients well. You will be leaving the skin on everything so make sure it's clean.


Slice Cucumber into 1/8" slices with skin on.


 Slice the limes into 8 sections going from tip to tip. Slicing them in this direction keeps the pulp in the drink to a minimum.


You will cut the lime in half, then cut the halves in half, and then cut the quarters in half to make 8 slices from each lime.


 Slice the 2 lemons the same way you sliced the limes.


 I use very little ginger root because it is so potent. You will need less than 1 cubic inch and will slice it as thin as possible while still making it thick enough to stay in tact in water. The end result is slightly smaller than a quarter and about as thick.


Pull out 7 to 8 freezer safe bags. I use the 1 quart size. You will need 8 if you plan to freeze it all or 7 if you are making 1 batch to drink when done.


Into each bag you will put 2 lemon slices, 4 lime slices, 1 ginger slice, and 4-5 cucumber slices.


 Fill each bag 1/2 way with water. Get as much air out as you can before you seal it. Label the bags so you know when they were made and then put them in the freezer.


I stack mine in the freezer to save room.


 When you are ready to drink a glass pull a bag out of the freezer and put it in your pitcher. Pour fresh water over it until the pitcher is full. Once the ice melts you simple mix it 50/50 with apple juice and drink. I prefer to mix mine in the glass (I just eyeball the halfway point) because if you mix the apple juice in with the water it won't last as long in you fridge. If the water has too strong of a flavor for you add more water to dilute. I normally end up with 1.5 liters of water from 1 frozen bag.

I try to remove the floaters (the lemon, lime, ginger, and cucumber) from the water with a slotted spoon anywhere from 1 hour to 12 hours after the ice fully melts. If you leave the fruit in the water longer the taste becomes bitter. This will keep about a week in your fridge before you will need to make fresh.


 The portions for a single batch are 1/2 a lime (4 slices), 1/4 of a lemon (2 slices), a small slice of ginger root, and 4-5 cucumber slices. When not freezing let ingredients sit in the water 12-24 hours before removing with a slotted spoon. Mix 50/50 with Apple Juice when ready to drink.


 Slicing the ingredients every time you run out makes it seem like a lot of work. This is why I started making it in bulk. A nice variation if you want something a touch more refreshing even is to add a few mint leaves to the bags before freezing. It makes this refreshing beverage even more thirst quenching!


Thanks for reading! Let me know what you think of this and if you came up with any variations of your own.


Follow me on Pinterest for more amazing ideas or like me on Facebook to keep up with all the most recent updates. 

Saturday, July 14, 2012

Confessions of a Crazy Crafter

     Sometimes I think Springs and Summer are my favorite months. I feel incredibly productive with so many hours of light! One of the things on my plate this summer is leading a charity event for an animal shelter. I chose the Teller County Regional Animal Shelter to help on behalf of Artist's Helping Hands for many reasons.
     - They are a no kill shelter meaning they do not put animals down if they don't find owners.
     - They aided many people that evacuated during the Waldo Canyon Fire in Colorado.
     - When our dog found his way to their shelter they called to let us know and took such good care of him while he waited for us.
help furry creatures
Cassius the Great and my wonderful little man pose for me.
I'm excited to collect donations during the month of July 2012 for them and have already seen a great show of support from the charity group. I hope to hand out treats to some of the animals when I deliver the donations. If I am able to I will make sure to take pictures and post them.

     One of my personal projects this month is a cloth book of shapes for my son. Using an old pair of jeans and some colorful fabric scraps I've managed to cut out squares, diamonds, circles, rectangles, ovals, stars, and triangles. I am then sewing these onto large pieces of fabric which will become the pages. I can't wait to see the look on his face when I give it to him. Books are his favorite "toy."

     As I face moving in some 45 days I find myself hoping this next home will be a place I can stay for a while. With 3 bedrooms, a greenhouse, and an area inside large enough for me to start making full sized tipis it sounds like heaven to me. The yard is a decent size as well (though it needs a lot of work) and I hope to get permission from the landlord to keep chickens. It's a big move. The house needs a lot of work... cleaning, repairs, TLC, and such. The price is right though and despite all my nervousness I'm really excited to start on such a large project.

grocery bag shopping tote quality canvas sack     As far as Tiny Tipis goes I must say it is well. I recently filed my LLC forms making it an official company. It's the first step in taking things to the next level. I've also been evaluating ways to expand and offer more choices. One way I plan to do this is by offering hand painted bags. These are fairly easy to do, don't take up extra space in my currently small home, and the end result is making my customers very happy. For each new design I keep a stencil that can be traced on the canvas and then paint each one by hand with acrylic paint. I could cut corners and iron on printed designs but I don't want to loose the personal touch the hand painting adds not to mention the higher quality end result. I plan to start a line of more modern ones as well that will feature graffiti style art.


     For my own closet I decided to go through it and start recycling and upcycling my old clothes. A work in process is this thin shirt. It had holes at the hip seams that needed fixing and I decided to start giving it a new life. As soon as I finish it I will post a step by step blog on exactly what I did to it. Of course I had to add some lace to it.  ;)

recycled top feminine
I love lace  <3 <3 <3

If you would like to follow my garden blog you can do so here!

Thursday, June 21, 2012

Fabric Bowl Project Obsession

http://whipup.net/2008/09/20/how-to-fabric-bowl/
I've been a bit obsessed with fabric bowls this week. What a useful concept! They are washable, portable, and nearly unbreakable (perhaps the most useful feature for a stay at home mom.) I saw a picture on pinterest of a tutorial on how to crochet a sturdy bowl using multiple threads. When I clicked the link of course they wanted $4.99 for the "pattern" so as a seamstress/artist/creative type I stared at the picture for a moment and then set about making myself a bowl. I've since moved on to making nesting bowls for my husband and I's fifth wheel as these proved so nice.

First I would like to cover the various types of Cloth Bowls I saw. There are wrapped and sewn bowls, pattern sewn bowls (I call them petal bowls because of how the pattern looks before sewn), woven bowls, glue hardened bowls, and crocheted bowls. Of these types of handmade bowls the ones hardened with glue or fabric stiffener are the least portable. A soft bowl can be folded so that it fits in a small flat area and takes up less space - something I appreciate very much for storage space in the camper.

I decided to try the crocheted bowl since I had the materials readily available. Since there are two threads involved it makes the bowls a little stronger and more able to retain shape. The outer thread that is seen is plain yarn while the inner thread is an old t-shirt I cut into strips. The t-shirt yarn is thicker than the regular yarn so it gives the bowls the stability the standard yarn lacks. As you can see in the photo I used a single crochet and simply worked my stitch around the t-shirt yarn. When I've completed 10-15 stitches I gently tug the t-shirt yarn and it tightens everything. I repeat this the whole way through giving the bowl a more finished look. Don't tug too hard on the t-shirt yarn though or it will cause the prior stitches to buckle. 

I don't really have a formula or pattern I follow. I increase stitches and do my best to keep the first few rows flat and even because these become the base of the bowl. When I have the base 10% larger than looks needed I stop increasing so the sides will start to come in. I like to pull the sides of the  bowl in at the top as an extra stability feature. I do this by decreasing stitches on the top 2 rows only. I do the top 2 rows with a contrasting standard yarn and no t-shirt yarn filler. 

You can cut the t-shirt yarn and simply leave it loose in the stitches over it or you can pull it out and use it as a decorative stabilizer. I pulled my white t-shirt yarn out when the main bowl color ended and stitched it in swirls around the exterior of the bowl. This seemed to pull the various rows together even more and added a look I liked. 

The first bowl I made. It contains my husbands lighters on the counter.
There are no limits to these bowls except your ability and creativity. Crochet stitches come out so try something new. If you don't like it just pull it out!

To see other things I've made that are for sale or to request custom items and art visit my Etsy Page.